So, what we need to do is strip our "problem" into two parts. First part installing the AWAgent without Local Admin Rights (LAR) and the second part stage the Windows 10 Device and automatically reassign the user.
Let us start with the first Part. First of all, we need our staging User. So, inside the Workspace UEM Console, we create a new User (Local user not an LDAP User) and give him the staging Permission.
Important:
LDAP binding is required when staging devices.
Navigate to Accounts > Users > List View and select Edit for the user account for which you want to enable device staging.
In the Add / Edit User page, select the Advanced tab.
Scroll down to the Staging section.
Select Enable Device Staging.
Select the staging settings that will apply to this staging user:
Single User Devices stages devices for a single user. This user is the next Network User to log into the device.
Toggle the type of single user device staging mode to Standard:
Standard staging requires an end user to enter login information after staging.
Ensure Multi-User Devices is set to Disabled.

Ok so we are now ready to stage our device, but still, we have not Agent on our Windows 10 Devices?
Answer:
To deploy the Workspace ONE UEM Device Management Agent (AWAgent.msi) using a Group Policy Object (GPO), complete each of the steps detailed below, in order:
- Download the AWAgent setup file from AWAgent.com.
- Create a network share that is accessible to all of your client’s computers and put the AWAgent setup file in the shared folder.
- Create a Group Policy Object that forces the domain-joined computers in a security filter to execute the AWAgent setup file through a scheduled task.
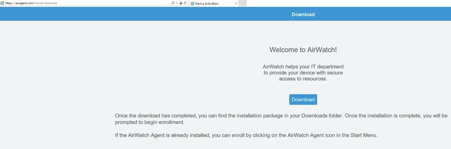
Step 1: Download the AWAgent setup file
Just open your browser (please have in mind that you need to do this step on a Windows device otherwise you will receive the wrong Agent) and visit www.awagent.com and select "Download ".
Step 2: Create a network share that is accessible to all of your customer’s computers and put the AWAgent setup file in the shared folder.
- Log on to the file server as an administrator.
- Click on Start and search for Server Manager.
- Click on Server Manager from the search results.
- Click on File and Storage Services.
- Click on Shares.
- Next to Shares, click on Tasks.
- Click on New Share.

- Continue through the New Share Wizard prompts until finished, then click on Create.
- Right-click on the new share in Server Manager and click on Open Share.
- Put the AWAgent setup file in the share.
- Write down the share's network path, this will be needed when creating the scheduled task.

Step 3: Create a Group Policy Object that forces the domain-joined computers in a security filter to execute the AWAgent setup file through a scheduled task.
- Log on to the Active Directory Domain Controller as an administrator.
- Click on Start, and search for Group Policy Management.
- Click on Group Policy Management.
- Right-click on the desired Active Directory domain, and then click on Create a GPO in this domain and Link it here.

- Enter a name for the GPO, and then click on OK.
Note: By default, the GPO will apply to all users and computers that successfully authenticate to the Active Directory domain. - To narrow the scope of computers that install AWAgent, select Authenticated Users, and click on Remove.
Confirm the removal. - To add a new security filter, click Add.
Type the name of the security group that the target computers are a member of, and click on Check names.

- Right-click on the new GPO, and then click on Edit.
- In the console tree, under Computer Configuration, click on Preferences > Control Panel > Scheduled Tasks.
- Right-click under Scheduled Tasks and click on New, and then click on Immediate Task (At least Windows 7).
Note: For more information about Scheduled Task Items, read the Configure a Scheduled Task Item TechNet article.

- Enter a name and a description for the Scheduled Task.
- Click on Change User or Group.
- Type "system" into the Object name text box.
Click on Check Names.
Note: Make sure that the system object name resolves to NT Authority\System. - Under Security options, click on Run whether a user is logged on or not and add a checkmark next to Run with highest privileges.
- In the Configure for drop-down menu, select Windows 7®, Windows Server™ 2008 R2.

- Click on the Actions tab
- Click on New.
- In the Action drop-down menu, select Start a program.
- In the Programs/script text box, enter the network path for the AWAgent setup file.
Note: If you use the Browse button to find the location of the script, then it will add the path as c:\xxxx. This is incorrect since the script needs to include the UNC path and not the local path. Be sure to replace the c:\ format with the \\servername\sharename\ format.
Let us stop here with the first problem and have a look at the second problem. Everything you find for installing AWAgent silently or through the command line covers the step through a software deployment solution or manual staging and then hand over the device. So, let us have a quick look what's going on if we are using manual Staging: (by the way the same fits for automatic deployment through so software distribution solution)
We sign in to the Device with a local administrator account install the AWAgent with a few parameters:
AirWatchAgent.msi /quiet ENROLL=y IMAGE=N SERVER=dsxx.awmdm.com or your On-Premise Device Server LGName=Test USERNAME=StagingUser PASSWORD=MyTopSecretPassword
All of these Parameters can be found at the office Workspace ONE UEM Documentation, but let us have a quick look:
/quiet Install the AWAgent without any User Input
/ENROLL with the value "y" the installer also performs an enrollment of the device
/IMAGE with the value "n" the installer is not switching to the Image mode I will cover this in a second blog post.
/Server is our device server either On-Premise or in the cloud
/LGName is our organization group name in which the device should be enrolled
Username and Password from our Staging user.
As described before we do this as a local administrator, which means next time when the user signs in the agent will automatically start the reassignment. But this is not the right solution if you have already handed over Windows 10 devices to your Endusers. Long story short - after digging deep into the MSI File with Microsofts Orca I figured out a parameter called
ASSIGNTOLOGGEDINUSER=<Y/N>. So if you install the AWAgent through command line but already in the context of the signed in User then you need this parameter.
So back to the first problem we need to add the parameters in the Add arguments (optional) field. - Add parameters /quiet ENROLL=y IMAGE=N SERVER=dsxxx.awmdm.com LGName=Your OG USERNAME=Your Staging User PASSWORD=PasswordoftheStaginguser ASSIGNTOLOGGEDINUSER=Y
Note: There is no typo in the command the ASSIGNTOLOGGEDINUSER Value is without "/"! - Click OK.

- Click on the Conditions tab.
- Add a checkmark next to Start only if the following network connection is available, and then select Any connection.
- Click on the Common Tab
- Select Apply once and do not reapply

- Click OK.
- Close Group Policy Management Editor, and then close Group Policy Management.
The AWAgent setup file will execute on user computers at the next Group Policy refresh, typically every 90 minutes, with a random offset of 0 to 30 minutes.
So that's it we can no install the AWAgent on Devices which are already in use by our end-users the get automatically enrolled and after the successful enrolment the end-user will be prompted for the Organisation.